Buttery Breton Sablee Cookies

Photos by Greg Nesbit Photography

Franck loves to say that I’m living the dream: “Every American woman wants to be married to a French guy!” I like to humor him, but I had enough experiences in professional kitchens with French guys way before I even met Franck that for a long time I figured that there was NO WAY I would ever marry one…But one should never generalize, n’est ce pas? Life is just too crazy.

Being married to a French chef has its benefits, for sure. When preparing meals at home my strategy is to pull everything out onto the counter and start working through it; making the table empty out and seeing the pot fill up gives me so much satisfaction. Even better when Franck wanders by, “Do you want me to just chop these up for you?” Ten minutes later and I’m on my way to other things, it’s phenomenal…And there are not too many spouses who will go out and buy lobsters to cook for you at your slightest craving. Roasted with garlic-herb butter, they are the ultimate. I really can’t complain too much. It’s a marriage between two food-obsessed people, so what would you expect?

But would I be exaggerating if I said that one of the best things about being with Franck and going to Brittany to see his home was discovering pastries made with salty Breton butter?? Maybe only slightly.

They sell bags of cookies in Brittany that look like dry, hard discs: no icing, no chocolate, no dusting of sugar over the top, absolutely no hoopla whatsoever. You might overlook them and go for something with more pizzazz…big mistake. These cookies are the most amazing and delicious cookies in the world! Called Galettes Bretonnes, they first crumble luxuriously when you bite into them, and then all of that Breton salty butter kicks in and they literally melt in your mouth. That tingle of salt wakens up your tongue and you just have to reach into the bag and grab another…and another…Are you ready to hop a plane to Brittany with me yet?

You might not have to. Thanks to one of my all-time favorite pastry muses, Dorie Greenspan, there is a recipe for these Sablées available to us over here on this side of the Atlantic which makes an extremely fine approximation. I was so excited to try it when I cracked open my copy of her Baking, from My Home to Yours, which is just one of her fabulous books. They really came out great and made the perfect foil for our Lemon-Lavender Possets at the restaurant. When you go to make them you can find some really fancy, expensive and delicious salted butter to make them with. Yum. Either way, the recipe is great, and it is so high at the top of my list of favorites, it was one of the first that I tried using Einkorn flour instead of regular flour. The results were truly fabulous: I continue to go on about Einkorn and how deliciously its flavor marries with butter. Well, the simplicity of this recipe really lets the flour shine. But of course, there’s enough salty, sweet yumminess even with regular flour, as you would get them in France, so give them a try either way.


Breton-style Buttery Sablées

Makes approx. 24 cookies


2 sticks soft butter

½ c (100 g) sugar

¼ c (30 g) powdered sugar

½ t (3 g) salt

2 yolks

2 ¼ c (280 g) Einkorn flour (320 g if using all-purpose flour)


1. Cream butter with sugars and salt very fluffy. Add yolks one at a time to make an emulsion, then add the flour. Mix just to thoroughly combine, scraping down the bowl to make sure there aren’t any stray butter lumps. Chill dough until firm, then form into rolls about 1 ½” in diameter. Wrap each roll in plastic wrap and then roll on the counter into the roundest shape you can. At this point you can freeze the dough, or just chill it well so that it keeps its shape when you slice it.

2. Heat oven to 350F. Pull dough logs out of the fridge and unwrap. Brush lightly with lightly beaten-egg and then roll in either decorating sugar crystals, or I like to use Sugar in the Raw or Demerrara sugar crystals. The crystals stick to the edges and make a nice sweet crackle and pretty finish to the cookies. I know I said no hoopla, so you can forget this if you like. (One suggestion Dorie Greenspan makes in another book is to plop the rounds into the bottoms of muffin pans and bake them. I’ve only done this once and it’s true that it results in a cookie that very much resembles what you get in France: tall, toasted brown sides and bottoms. It’s really up to you. All are delicious and mouth-watering, and the dough will stay happy in its little logs in the freezer until the day when you just have to have some fresh sablées.) Use a sharp knife to cut through the dough making just under 1/2 inch-tall sliced rounds.


3. Place cookies on a greased or parchment-lined cookie tray, spacing them about 1 ½ inches apart, as they do spread a bit (Einkorn ones spread a bit more). Bake for about 14-17 minutes until the edges are starting to brown, one cookie lifted with a spatula shows it’s brown on the bottom, and they smell delicious. (Pastry chefs tend to use all of their senses to verify this kind of thing: too much wasted time and ingredients if things aren’t baked properly! Timers are critical, too. Usually people who say they don’t like to bake, I think, do so because they don’t want to take the chance of putting in the effort and not getting great results. Totally understandable. So touch, look, smell and make sure everything’s the way you want it to be at each stage. Your oven, the thickness of your baking tray, the actual size that your logs ended up being, all of this will affect the baking, so you need to use my guidelines, but verify well for yourself before pulling them out.)

4. I think that these cookies actually taste best when completely cool, and the butter has set up again so that it melts in your mouth. This doesn’t mean that you can’t try a warm one if you want to, though!

Warm Dark Chocolate Tart

Le Gavroche’s Warm Dark Chocolate Tart with Einkorn Crust

Photos by Greg Nesbit Photography

What’s the deal with “secret recipes”? Not only is the concept morally unsound to me, but it’s completely redundant: if no one ever shared great recipes, where would we be today? Isn’t the very root of the word recipe “to receive”?? Also it’s frankly absurd: if someone really wants your recipe, go ahead and give it to them (now with enough searching you can find anything on the internet, anyway!) Are recipe-hoarders worried that someone is going to make it better? I love the concept coined by Elizabeth Zimmerman in reference to knitting: every recipe has been “unvented” — someone, somewhere, must have done it before. A recipe request is really the ultimate compliment, so everyone should just take it that way and get over it.

When I have a great recipe, from any source or of my own devising, I can’t help going on about it (just ask anyone who’s ever worked in the kitchen with me! I’m pretty unsupportable about it. When something’s bad, I’m the first one to say it, but when it’s good, it’s really good and worth bragging about!). I’m not the biggest chocolate fan, so when I find a chocolate recipe that even I consider irresistible, then I figure it really must be good. The Warm Dark Chocolate Tart is my ultimate chocolate recipe, and it was hard-won, making me that much happier to share it.

I made this tart every day for several months while working in London’s 2-Michelin starred Le Gavroche (twice a day, in fact, since it had to be baked at precisely 12 noon for lunch service and 7pm for dinner service, then presented to our chef, Michel Roux Jr., for approval). This beautiful and justly renowned restaurant was really the formative place for Franck as he developed his skills as a chef; he spent 5 years there, and I spent one year as pastry chef. We both consider ourselves lucky, despite the stress of the job itself, to have worked for a chef with such intense energy, talent, charm and intelligence. The discipline required to succeed at the job, as well as the skill and concentration to master the recipes themselves, have stood us in good stead in our work ever since. Though our chef was from an iconic culinary family, we still managed to speak a similar language of food with him and to develop close working relationships.

When Chef Michel gave me this recipe to produce for the restaurant he couldn’t help praising it himself. He had developed it while in search of the perfect chocolate tart, something which had been eluding me for some time as well. Though he is known for his marathon-running, and used his afternoon break during his 15-hr + workday to exercise, Chef Michel has an infamous sweet tooth, and it’s largely why we got along so well. He loved it when I’d make him some American sweets, especially peanut butter cookies and brownies, and in this way we exchanged recipes (the way that you’re meant to do!). His decadent tart itself almost feels like the most intensely-flavored and lightest chocolate soufflé you ever tasted, surrounded by a crisp and buttery pastry shell. Einkorn flour makes an incredibly tender and crisp dough with a delicate, slightly nutty flavor that perfectly complements the chocolate and butter in the recipe. Just be sure to pre-bake the dough all the way before you add the filling, so that it’s crunchy and delicious the way that Chef Michel intended it to be!

First, make the Pate Sucrée (Sweet Tart Dough). This recipe can easily be made with regular flour instead of Einkorn, but the nutty taste of Einkorn really makes the most delicious tart dough!

Pate Sucrée

Makes enough for 4 11” tarts (I use fluted pans with a removable base).

3 1/3 c (500 g) Einkorn (or all-purpose) Flour

2 ¼ c (250 g) sugar

1 t (5 g) salt

3 large eggs

250 g soft butter

  1. Cream the butter, salt and sugar fluffy with the flat beater of a stand mixer or a strong arm with a wooden spatula. Add the eggs one at a time to create an emulsion. Add the flour in 3 additions, working gently and mixing minimally to combine with each addition. Divide finished dough into 4 and pat into flat rounds. Wrap each separately and freeze for future quick and easy tart-making happiness!


Warm Dark Chocolate Tart

Really good dark chocolate is one of the secrets to success with this recipe. I don’t use chocolate with less than 65% cocoa content, so that the tart isn’t too sweet.

Makes 1 11” tart

8.3 oz (280g) Bittersweet Chocolate, chopped

6 ¼ oz (188g) sweet butter

2 whole large eggs

3 yolks

½ c (95g) sugar

Pinch salt

  1. Line an 11” fluted tart pan with Pate Sucrée and let chill/rest (I like to do this the day before, but ½ hr of resting is fine, particularly with Einkorn flour which has such low gluten content, it doesn’t tend to shrink when baked). Preheat oven to 400F, then line pan with parchment paper, baking beans, and pre-bake until fully cooked (lightly browned and doesn’t smell raw). I like to remove the beans after about 10 minutes so that the base gets nicely cooked through. When fully baked, perhaps another 8-10 minutes after removing the beans, set base aside and lower oven temperature to 300F in order to bake the complete tart.


  2. Make your chocolate filling: Place the butter in a saucepan and cover with a heat-proof bowl with the chocolate in it (use a pot and a compatibly-sized heat-proof bowl that fits over it and doesn’t allow the burner flames to scorch the chocolate). Place over low heat to melt the butter and start melting the chocolate. When the butter is melted, pour over chocolate to finish melting, and whisk together. This is my preferred way to melt butter and chocolate (the most heavenly of combinations…if it were a perfume I’d dab it behind my ears!). If you prefer another way, go for it, just get the job done!

  3. Meanwhile, make your sabayon (fluffy eggs and sugar mixture.) Place eggs in the bowl of a stand mixer fitted with the whisk attachment (if doing by hand, get a pot of water simmering on the stove and a heat-proof bowl that fits over it and doesn’t allow the burner flames to scorch it, either. Also have a nice sized whisk and a glass of water handy. It’s hard work, but worth it for this amazing tart!). Add the sugar and begin to whisk on high speed. This is where a blow-torch comes in handy! Warm the bowl with the torch, moving it constantly so as not to cook the eggs. When the bowl feels warm to the touch after removing the flame, then allow egg mixture to whisk itself cold. (If doing by hand, take the bowl off of the water pan when the mixture is warm to the touch, then whisk it until cold, approximately tripled in volume and super-fluffy) A good, strong sabayon is the secret to the texture of this tart and the heat is what makes that strength. If you don’t have a blowtorch, place your eggs (whole, in shells!) in hot water for a few minutes before cracking them to warm them, or start with room-temperature eggs.

  4. Combine your gorgeous, fluffy sabayon with the chocolate and butter. Fold together (don’t stir! Keep all that beautiful air in!) until just combined. Gently pour into baked tart shell and place immediately in the 300F oven. Bake for 10 minutes. The surface will look dry and not starting to crack or soufflé (remove from oven at the first sign of this). Tart can be cut with a hot, clean knife when still warm, or you can make the tart ahead, chill it, and cut it easily with that same warm, clean knife (dip in hot water and wipe between cuts if you don’t have a blowtorch!). Then just heat slices for 4 minutes in a hot 375-400 oven. Though the texture is light, the flavor is really rich, so I like to serve the tart with some fresh berries, berry sauce and whipped cream or ice cream.


Blueberry-Lemon Scones: a recipe with photos

Fruit, Oat & Einkorn Scones

Makes 16 scones

Adapted from Linda Rondinone, Block Island, RI

Photos by Greg Nesbit Photography

In an industry which specializes in hot and crazy, you have to be pretty selective about your jobs. It’s rare to stumble into a dream job: a kitchen with a window and a decent amount of work space, some amount of freedom to make what you want and a generous budget for ingredients, enough help to make it possible to do something above and beyond within a reasonable amount of hours…for a decent wage and lovely bosses! I had the good fortune to enjoy a few dream jobs before we created our own “chez nous,” more or less just the way that we wanted it to be. So I couldn’t have been happier or more appreciative during the summer of 2000, to find myself working at the Atlantic Inn on Block Island for owners Brad and Anne Marthens and chef Ed Moon.

My job came with an assistant, a breakfast baker who wanted to do more on the dessert side, and in exchange for me making breakfast on her days off, she would apprentice with me on plated desserts and French baking techniques. Linda became much more than an assistant, a great friend, a kindred spirit and a lively personality to work with every day. (I’m fond of saying that there aren’t too many people that you wish to see at 5am every day, and Linda’s obsession with baking makes her just as happy and energetic to be up early and working as I am!). After my sunrise-lit stroll up the hill to the elegant Victorian Inn, we’d spend our days baking and trading recipes, trying new things and becoming close friends. While I was able to help her work croissants and pain au chocolat into the breakfast repertoire at the Inn, she introduced me to some fantastic American-style breakfast pastries which later became best-sellers when I eventually opened a bakery: sticky buns, cinnamon buns, and the most addictive, buttery scones I’d ever tasted.

My chef in pastry school in London was adamant about spending some time on English pastries, including my beloved English scones. He rightly stated that if you’re going to work in the industry as a pastry chef, you could easily end up at a job where you had to make scones every day, so “you’d jolly well better know how to do them correctly!” Later, during my internship at the Churchill Intercontinental Hotel not far from the school, the daily scone-making task quickly fell to me, in fact, thanks to his effective teaching.

I love to make scones of every kind and every day, but for my own personal snacking it doesn’t get any better than Linda’s scones. They don’t need jam or butter, they are sweet and satisfying just the way they are. I’m happy to say that they are just as delicious or more made with Einkorn flour, but wheat flour works perfectly well. I’ve done many variations: blueberry-lemon, cranberry-orange, candied ginger, apple & cinnamon, banana-chocolate chip. You can put the fruit of your choice and make the glaze to compliment it (a plain glaze with some buttermilk & powdered sugar is nice when you want something neutral). This is one of the few places where baking intersects with cooking in the sense that you can go off on your own a bit, so enjoy it!


3 cups (430 g) Einkorn (or AP) flour

1 ½ c (138 g) quick-cooking oats

2/3 c (138 g) sugar

1 T + 1 t (20 g) baking powder

¾ t (4 g) salt

2 sticks + 1 T cold butter, cut into small cubes

1 ½ c buttermilk, cold & well-shaken

1 ½ c wild Blueberries ( I prefer to use frozen berries here, as they keep the dough cold for longer while you’re working with it!)


-Preheat oven to 375F

-Line two baking trays with parchment paper.

-Work in stand mixer with flat beater, or in a large mixing bowl by hand. Place all of the dry ingredients into the bowl and whisk to combine well. Add the cold butter and cut in until mixture resembles very coarse meal with only a few larger butter lumps (sometimes I use my fingers to flatten the cubes slightly, just don’t handle too much or you’ll warm up the butter with your fingers and your dough will be soft and harder to work with).

- Add the buttermilk all at once and mix a few times with a spatula or dough scraper. Before dry ingredients are completely combined, add the fruit. Finish the mixing all together (this way you avoid over-mixing), then scrape out onto a floured board or table.

- Working quickly, divide the mix into two equal masses and pat out (use flour as necessary to keep from sticking…this is messy!) into circles about 8 inches diameter and 1 1/2 inches high. Cut each into 8 wedges and use a bench scraper or flat spatula to move onto the lined sheet trays, leaving at least 1 ½ inches between scones (they grow!). Bake for about 20 minutes until nicely browned on the bottom (use a spatula to lift a middle one up to check).

-Meanwhile, make your glaze:

1 ½ c powdered sugar

Zest of 1 lemon

Juice of 1 lemon

-Mix together and put aside until scones come out of the oven. Add splash (literally) of water if it’s not a brush-able consistency. Brush quickly onto warm scones to get a shiny, transparent glaze.

Scones keep at room temperature for a day, or can be frozen for up to 3 weeks, well-wrapped.

To improve your scone (& biscuit) making in general: Pre-weigh dry ingredients and cube butter and store in the fridge the night before to make early morning scone satisfaction easy!

-Get trays lined and small equipment (spatulas, etc.) ready before you start, so you can work quickly while the dough is cold. The warmer it gets, the messier the whole job becomes.

- Let cut scones rest on their trays in the fridge if possible, 10 or 15 minutes. This allows for the grain to absorb the moisture more completely and the scones hold their shape better. They’re still beautiful and delicious if you miss this step, but it’s nice if you can do it.


A Creamy Crab Gratin…

It really is hard to articulate exactly how incredibly intensely we worked in the kitchen at Le Gavroche in London. At the time, it was kind of surreal to be constantly running, never having a sense of control over the job in front of you, never having had enough sleep that wasn’t ridden with dreams reenacting the job that you did or didn’t get done to your satisfaction during the day before. There were about 16 of us in the kitchen, I never picked up my head long enough to get an exact count, and people did come and go at an alarming rate, but there was only one among us who seemingly had everything down. Franck ran, sang, chatted and cooked all at the same time in that kitchen. The chef would arrive, all of us with our heads down to our tables working at top speed, or slipping along the kitchen with something in our hands shouting “Chaud derrier! Hot behind!” to no one in particular, even if what we were carrying happened to be cold. And during this frantic prep time, only one person would be working away, chattering about this and that, making jokes, and that person was of course Franck. He had worked in this grueling kitchen already for 4 years, and been promoted sous-chef upon his re-appearance there in 1998, when he arrived from the States with me in tow to work as pastry chef. The chef would lament, loudly, “ONE voice! Why is it that I constantly only hear one voice in this place!” For anyone who knows Franck’s booming voice, you can understand what Chef Michel was remarking; there was only one person who could claim to really have his job down in that kitchen and to be loving every minute of it.

It was the kind of place where to not hear anything about your work was a good thing. No comment meant that you were doing things properly, doing actually a good job though that was impossible to imagine. I’d try to slide around and not be noticed as much as possible. The fact that I was the then-girlfriend of the sous chef didn’t provide me any advantage, but my determination to get through the visa and the job alive definitely did, and hearing that voice on the other side of the kitchen provided a small degree of comfort.

Though there was little or no praise at Le Gavroche, when Franck’s birthday came around the Chef offered a generous gift for all of his hard work: dinner for two at any Michelin-starred restaurant in London. We chose Nobu. It was the Chef’s favorite restaurant, and we were dying to go. We entered the sleek, bright dining room tentatively and sat down for our meal at Nobu. We’d attempted to look as presentable as possible that night, but always alas had the feeling that we were on the wrong side of things, that we didn’t really belong at a table being served, and our minds couldn’t help reflecting on the hell that we knew the chefs in the kitchen at Nobu were going through at that moment to deliver our perfect dinners. The hostess, however, didn’t have any idea that we were imposters, posing as deserving patrons in a gorgeous restaurant. She treated us as warmly and helpfully as any real guests and suggested the best ways to approach the fantastic menu. Half of our choices were made already, however, by Chef Michel’s recommendations. First thing we knew we had to try: the Crab Gratin.


From there it went on and on, Yellowtail Sashimi, Black Cod with Miso, the sushi – oh! the sushi — these dishes are iconic now and for good reason. But you can’t imagine how good they tasted to two people as tired and hungry for some pampering as we were that night. It was an unforgettable meal, and we play ho
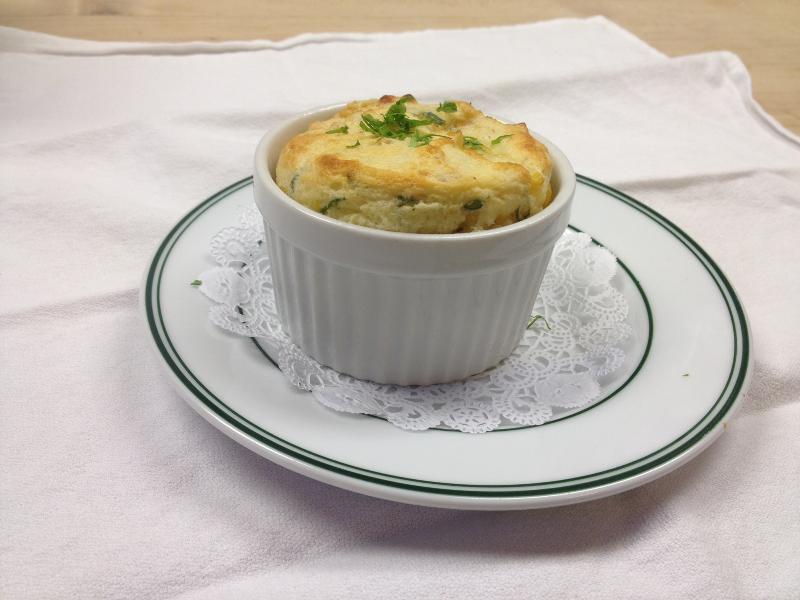
mage to it now on our menu with our variation on that delicious, creamy Crab Gratin:

Crab Gratin

Thanks have to go out to one of my pastry muses, in fact, the wonderful Rose Levy Berenbaum, who published Nobu’s recipe as a tart filling in “The Pie and Pastry Bible,” and gave us a way to attempt a replica of this rich and delicious dish.

  • 1 lb Atlantic lump crab or Jonah crab meat, picked through for bits of shell
  • ½ c mayonnaise
  • Juice of 1 lemon
  • ½ T Worcestershire sauce
  • ¼ c very finely chopped parsley
  • 3 scallions, finely sliced
  • ½ red pepper, finely diced
  • Salt, pepper
  • 1 ½ T lumpfish caviar
  1. Fold everything together and taste for seasoning.
  2. Sweat 2 leeks, finely sliced, in canola oil until melted, deglaze with splash of white wine, salt and pepper.
  3. Line gratin pan base with the leeks, top with the crab mixture and bake until browned and bubbling.

Braised Short Ribs in Red Wine…a Recipe

Photos by Greg Nesbit Photography

We make braised short ribs year-round here at the restaurant. We have to; people just love them. With olives and peppers in the summer, with Ponzu Sauce in the fall, it doesn’t matter what the temperature is outside, short ribs never seem to lose their appeal.

Short RibsH1

With our seasonal menu, we get to play on themes and variations constantly. In the winter, a classic preparation of short ribs in red wine, similar to a Boeuf Bourguignon, is usually the way to go. Hearty and luscious, the tender short ribs and their rich red wine sauce goes a long way towards warming up a long, cold winter night. Getting a good sear on the meat (hot pan, don’t crowd it too much, then remove the meat and much of the fat before continuing with the recipe) contributes so much to their flavor. A splash of deep red-wine reduction finishes the sauce.

Braised Beef Short Ribs in Red Wine

Serves 4

4X 14 oz piece short ribs of beef (cut with 3 bones in each)

1-2 qt stock (we use house-made veal demi-glaze)

4 T canola, or other plain, oil

-Season shortribs with salt and pepper. Heat oil in large, shallow pan and sear over high heat to brown on all sides. Make sure that you get a nice brown color everywhere; this is key to the flavor of the final dish. Don’t put too many pieces in at once or they will steam instead of brown. When browned, remove the meat, remove the excess fat (pour off into a cup) then sauté the following vegetables in the same pan:

Short Ribs11 onion

1 carrot

1 stick celery

4 cloves garlic

2 juniper berry, crushed

1 bay leaf

1 branch thyme

1 branch rosemary

salt

pepper

splash of cognac or brandy

-When the vegetables are nicely browned, deglaze with 1 750 ml bottle red wine. Return beef to pan and flambe with the spash of brandy,and then add the stock. Make sure that the meat is completely covered with liquid, and cover it well by either cooking in a dutch oven or using a sheet of cooking parchment pressed down over the top of the beef to keep it submerged. Slowly simmer over low heat or in a low oven until meat is tender, about 2 hrs. Finish with red wine reduction to taste and some seasonal vegetables.

Short Ribs2 Short Ribs3 Short Ribs4


To make red wine reduction, reduce to syrup:

1 750 ml bottle red wine

2 c port

1 c sugar

Winter vegetables: Caramelized pearl onion, carrot, mushroom, celery, rutabega

Short RibsH2


“Manger! Boire! Eat! Drink!” What is it and why should I go??

We’re getting ready to start up our popular Thursday night “Manger! Boire! Eat! Drink!” special theme dinners again here at Chez Nous and we’d love for you to come and check it out! We started these dinners two years ago as a way of fending off any off-season sleepiness, getting ourselves to step out of the kitchen, out of the normal “dinner” formula, often out of our comfort zone quite frankly, and enjoy the guests and show them something different.

Every week we choose a theme — an ingredient, a region or country, a technique or style of cooking — and we choose some dishes to fit the theme. We pair a couple of wines with the food, print up a sheet with all of the recipes for the night, present the wines briefly with some background and tasting notes, and do a short cooking demonstration in the dining room for the guests.

In the beginning it sounded like a fun way for us to meet fellow foodies and spend the evening enjoying and talking about cooking, food, and wine. We figured we had nothing to lose. Business tends to slow down on those dark, cold Thursday nights, so we thought at least we’ve found a way to keep trying new recipes, testing some new wines, getting to know some of our customers in a more personal way. If 4 people were to come, that would be great, and if 20 people show up, even better. Well, now 2 years later we have to say that it’s been a great experience so far to see so many guests, many of them nearly every week, coming in to try what we’ve got to offer and having a great time doing it. It’s kind of like hosting a party every Thursday and we’re ready to get started!!

The first MBED will be on Thursday, Nov. 1. We’re still deliberating the theme, but here is a list of previous themes that we’ve done. Let us know if there’s something you’re interested in learning about/tasting and we’ll be happy to put it out there! “like” us on facebook if you want to know the upcoming themes and other special events!

-Braising

-Gratins

-Risotto

-Working with Shellfish

-Fermented Foods

-Provencal Dishes

-Korean Food

-Mexican Food

-Lebanese Food

-Vegan dishes

-Gluten-free cooking (with a special guest nutritionist!)

-Low-glycemic cooking

-Beaujolais Nouveau Night

The best fruit shortcakes made with Einkorn flour

Einkorn flour shortcake with Berry Compote & Mascarpone-Vanilla Cream


I’ve continued to be amazed with each thing that I bake using Einkorn flour and how delicious it is! We currently have my dentist’s office in a meeting in our private dining room, and these folks have eaten many of my scones over the years. They’re one of my favorite things to make (and eat), a tender, sweet and buttery scone made with oats and lots of fresh berries and topped with a little glaze. I’ll share that recipe another time — generously shared with me many years ago by my friend and fellow pastry chef, Linda, back in our Atlantic Inn days (more about that dream job another time too!). Anyway, the whole group inhaled the scones and declared them the best ever, and I knew that already, because I baked them with Einkorn flour. This flour has such a delicious taste, unlike plain all-purpose flour which really has no taste at all. There is so little gluten in the flour, it makes incredibly delicate pastries, like using a lighter cake flour, with wonderful results. It’s kind of a secret weapon, but I’m sharing it with you and I hope you agree with me after you acquire some Einkorn flour and bake these delicious shortcakes. Fill them with any fruit you like. I like to macerate fresh fruit in sugar and a little liqueur (strawberries with Grand Marnier, for example, or blueberries with Creme de Cassis? why not?), and fresh whipped cream (a guest at the restaurant recently asked me if we used fresh whipped cream with our desserts and I’m happy I couldn’t see my own completely dumbfounded face: it took a second to register what she was talking about). Slice and mix up the fruit an hour or two before you serve them and the fruit will release its juice and make a syrupy sauce. Make the shortcakes ahead of time and freeze them if you like, then just let them get warm near the stove while you cook dinner and they’ll be perfect, moist and fresh when you serve them!

Shortcakes- makes 8

2 c Einkorn flour (or all-purpose flour)

2 t baking powder

1/2 t salt

1/3 c sugar + 2 T for sprinkling

3/4 stick cold butter

3/4 c heavy cream + 2 T for glazing

1t Vanilla

1 egg

-Preheat oven to 375F

-Place dry ingredients in the food processor with the cold butter, cut into small cubes. Pulse the machine (or cut by hand very very small if you don’t want to use a machine) a few times until the butter is in small pieces and well-dispersed. Turn out into a large mixing bowl. Mix cream, vanilla and egg with a fork to combine, then pour over the dry ingredients and mix deliberately with a spatula. When the mix comes together into a soft dough, pat it out on the table into a 1 1/2 inch thick circle using plenty of flour so it doesn’t stick. I like to cut the shortcakes with a sharp knife into wedges, place them on the baking tray, and then brush them with a little heavy cream and sprinkle with sugar. They take about 20 minutes in the oven to bake through (when in doubt, look on the bottom and make sure it’s brown, or slice into it to make sure the middle is cooked (you’re going to slice them horizontally when you serve them anyway, so no worries about cheating!)).

Corn Souffle

A Light and Delicious Corn Souffle at the end of the Sweet Corn Season


It’s tricky timing, but we do get many recipe requests in the summer and I’m doing my best to catch up with them all! Pinning Franck down to a written recipe is the first part of the challenge sometimes; but usually there is a run-away hit each summer that gets the most requests and this summer it has been our light and corn-packed Sweet Corn Souffle. A variation on the ever-popular Twice-baked Cheese Souffle, ours has no cheese, but can be baked once, and then a second time when you’re ready to serve it, making it a truly easy dish! We hope you enjoy before the last of the corn disappears for the season…

Sweet Corn Souffle

Corn Souffle - makes 12 6 oz souffles

Prepare molds: coat with soft butter and then bread crumbs


3 oz butter

2 oz flour

24 oz milk

6 eggs, separated

5 ears fresh corn

½ onion or 1 bunch scallion


-Mince onion and sweat in butter

-Cut corn off the cob, roast in a smoking hot pan or grill

-Pulse corn slightly in food processor

-Make béchamel with butter, flour, and milk, (melt butter, add flour, stir 1-2 mins to cook out the flour, then add milk gradually, bring to boil, whisking, and then simmer until thick and doesn’t taste flour-y) whisk in yolks at the end.

Whip whites with pinch cream of tartar to medium-firm peak.

Mix béchamel with onion, corn

Fold in whites, season to taste.

Portion into buttered molds. Bake at 375 in a water bath until firm.


Can chill when cooked and reheat when you want to serve.

-


Gluten Free Recipes, a Work in Progress…

This past year, gluten free cooking has become our mantra, as more and more guests come into the restaurant who are gluten intolerant. Not satisfied with merely serving them gluten-free bread and discussing the limitations of our menu for them, we decided that it was time to really restructure our menu in a much smarter way with regards to this now epidemic problem. Our friend and nutritionist, Elizabeth Dimeo, kindly joined our guests last Thursday for an informative and inspiring evening, discussing gluten-free diets and their benefits. My personal favorite thing that she said was how she described a typical, diet-conscious, working American’s day: “You wake up in the morning, and eat your Special K, since everyone says it’s good diet food, with of course , skim milk. By 10am you could eat a horse. Light-headed and hungry, you get through the rest of the morning, and now: lunch! A couple of slices of turkey between two slices of Pepperidge Farm skinny bread! With a schmear of mayo and a Diet Coke! Great. It’s 1 pm and have you had anything DELICIOUS or NUTRITIOUS yet to eat? Not at all. Now you get through the afternoon, by 4pm you’re ready for a nap. Snack, let’s not mention it, cookies, crackers, and now dinner…PASTA! with a glass of red wine. Do you know the best thing about this meal? The glass of wine!”

I have to admit, I don’t think she was exaggerating too badly here. I know that gluten-ful foods have been the mainstay of my diet since I became a pastry chef. But what Franck and I both have found since we’ve dramatically reduced our intake of these (much-beloved) foods, is that in fact when you take them out, not only do you get the benefit of a more varied and healthy diet, more satisfied and less tired, but also you end up replacing them with extra portions of more nutrient-rich foods: veggies, beans, etc. It’s just inevitable.

One of the reasons that we love Elizabeth so much is that she’s a foodie; she’s not advocatinga strict menu of bland, boring healthy foods. Our menu for Thursday night’s event was our attempt to get the guests excited about how delicious gluten-free recipes can be. So, since many folks who might be interested in some of our new developments for our own cooking weren’t able to attend last week’s dinner, I thought I’d post the recipes that we’ve shared with our “Manger! Boire! Eat! Drink!” people here:


Cauliflower “Couscous”

1 head cauliflower, shave with a sharp knife. Pulse in a food processor to the texture of couscous. Saute ¼ onion in olive oil and add ½ t curry powder, ½ t harissa, 2 T white wine, splash water, 2 T butter, and cook lightly.

Sprouting Lentils

Soak lentils one hour in a large jar. Drain and cover with Cheesecloth. Allow to sit in a cool, dry place for 2-3 days, rinsing with cold water 2 times/day, draining well each time. After 2-3 days you will see the root sprouting out of the lentils. Keep in the refrigerator until ready to use. Dress these lentils with vinaigrette to push up the protein and nutrient value of your salads considerably. We served them warm with the Cauliflower “Couscous.”

Chickpea Panisse

2 c stock

1 ¼ c chickpea flour

3 T olive oil

Salt, pepper

¼ c minced onion

1 t smoked paprika

1 T oregano

1 t espelette pepper

-Saute onion and spices in small sauté pan until tender

-whisk in flour, stock. Olive oil, cold

-heat up slowly while whisking.

-when thick like roux, and pulling away from the pan, remove from heat.

-fold in onion mixture, season.

-cool spread flat on mini sheet pan, cover with plastic, chill to cut into desired shapes and then pan- or deep- fry.


Grilled Chicken Marinade

5 lemons juiced and zested

6 garlic cloves, minced

½ bunch basil or cilantro, chopped

2 c honey

Salt and pepper


Gluten-free Blondies

1 x 7X11 sheet pan, greased and floured. Oven 350F

230 g gluten free flour**

½ t salt

1 ½ t baking powder

2 sticks melted butter

1 ¼ c brown sugar

½ c sugar

2 yolk

2 egg

1 ½ t vanilla

Chocolate chunks to cover

** gluten free flour mix:

2 c brown rice flour

1 c sweet sorghum flour

1 c coconut flour

-Melt butter and mix with sugars, add eggs, yolks and vanilla. Stir in dry ingredients, pour into pan and top with chocolate chunks. Bake until tester just comes out clean, about 25 minutes.


Watercress & Cauliflower Soup

1 head cauliflower, chopped

4 bunches watercress, washed

1 onion, diced

1 celery stick, diced

1 leek, sliced

1 c white wine

Salt, pepper, nutmeg

Vegetable stock or water

-sweat the onion, leek, and celery, add white wine, stock & cauliflower. When cauliflower is tender, season soup and add the watercress. Bring to boil, then turn off heat and puree.


Socca – Chickpea Crêpe

1 ¾ c chickpea flour

2 c water

1.5 T extra virgin olive oil

¾ t salt

Pepper


2 egg whites – whip to soft peak and fold into above

Can finish batter with fresh herbs, if desired. Pour into heated, oiled crepe pan. We served these with ratatouille and braised Swiss chard.


Quinoa Jumbalaya

4 servings


12 shrimp

20 bay scallops

2 T olive oil

1 medium onion, chopped

1 green pepper chopped

2 stalks celery, chopped

4 cloves garlic, minced

1 large tomato, diced

2-3 T tomato paste

¾ c quinoa, rinsed

1 c white wine

1 c vegetable stock or water

1 t paprika

¼ t cayenne

1 t dried oregano

1 t dried thyme

3 bay leaves

Salt, pepper

Sweat onion, pepper, celery & garlic until translucent. Add seasonings and tomato paste. Add tomatoes, salt, pepper and quinoa, stock & wine. Bring to boil & cover 15 mins. over low heat. Stir occasionally and check if quinoa is fully cooked. Add shellfish at the end and check seasoning.


What is Petit Epeautre/Einkorn Grain?? Why Should We Eat It?

The event that I attended in Boston yesterday at the Chef’s Collaborative was called “It All Comes Down to Grain.” I’ve been thinking about grains so much lately, and trying to bake with Petit Epeautre/Einkorn grain, to make healthier, but equally delicious, pastries. The challenges, the goals, the context — all have been fluttering around and I needed to verbalize this for the chefs and farmers at the event in just a few minutes. Ugh!

The first part of the event was a presentation by Eli Rogosa, the woman whom we met in March, an anthropologist working on saving heritage grains from extinction. One of her favorites, of the many seeds she has tested aquired from gene banks around the world, is Einkorn or Petit Epeautre in French. Her original grain was collected in Europe, and multiple field trials sponsored by the USDA at UMass resulted in great production from the Einkorn plants in the Berkshire climate. It has twice the protein and minerals as modern commercial wheat, and is considered “gluten safe” for many people who have been dealing with wheat and gluten sensitivities brought on largely by the hybridization and manipulation of modern mono-crop wheats. Today’s blended “all-purpose” wheats have been bread to grow very low to the ground, in order to be less fragile, have a very short root system, and are grown as mono-crops, making them highly dependent on synthetic fertilizers to help them grow. They have been bred for high gluten content, to make the lighter, puffier loaves of bread that we’ve all grown accustomed to. In fact, it seems that they’ve been so manipulated that they are much less digestible and have been making more and more people sick! The ancient wheats and grains have the advantage of a very deep root system, making them much more hardy, though they grow very tall (as we all imagine wheat does and should, but it doesn’t anymore!). As Eli points out, in a capricious climate change environment such as we are now living in, better to depend on grains that have survived 1000′s of years and have the ability to survive without synthetic fertilizers or possibly with very little water! Nevermind that they are easily digestible and organically grown.

But do these grains taste delicious? Are they easy to work with? As I said to the guests at yesterdays event, “Yes, you can make French pastries with ancient grains!” Who knew? It’s very satisfying to work with this beautiful flour: It has a delicacy of flavor and a silkiness to it which is very appealing, and butter just seems to bring out these qualities even more. I’m learning to bake all over again, and it was a great experience to attend the event in Boston yesterday, meet some like-minded chefs, and get to validate and contextualize a bit more our decision to limit our working with commercial wheat and maximize our use of the ancient grain Petit Epeautre! It’s not “all-purpose” but why should it be? It’s very liberating to be able to think and act holistically about what we’re doing as chefs. It feels like a missing link has been supplied in our sourcing of healthier, pesticide-free, not genetically modified REAL FOOD to serve at our restaurant. We have no interest in working with a product which is largely indigestible. And when you can have excellent results, there’s really no question. As Eli says “Eat it to Save it.” We cannot lose these ancient grains!